Tutorial - Getting Started
With Python EasyAccept
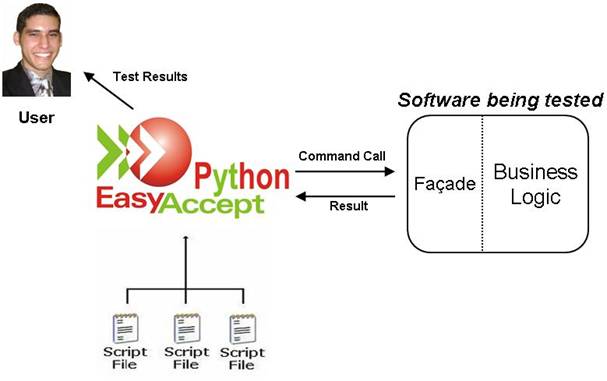
How Python EasyAccept Works
1. Clients (or whoever is assisting clients) write acceptance tests in
simple text files using any editor they choose. See below two test script
samples to test a project called PhoneBook.
1.1 Test script file US1:
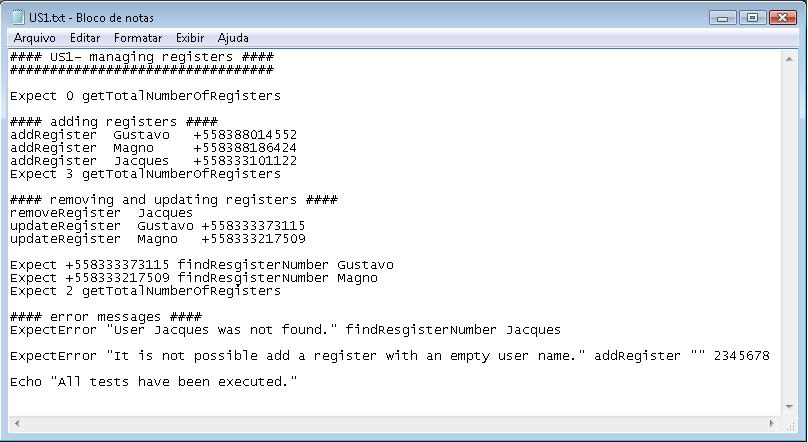
US1: Sample tests for a
PhoneBook
1.2 Test script file US2:
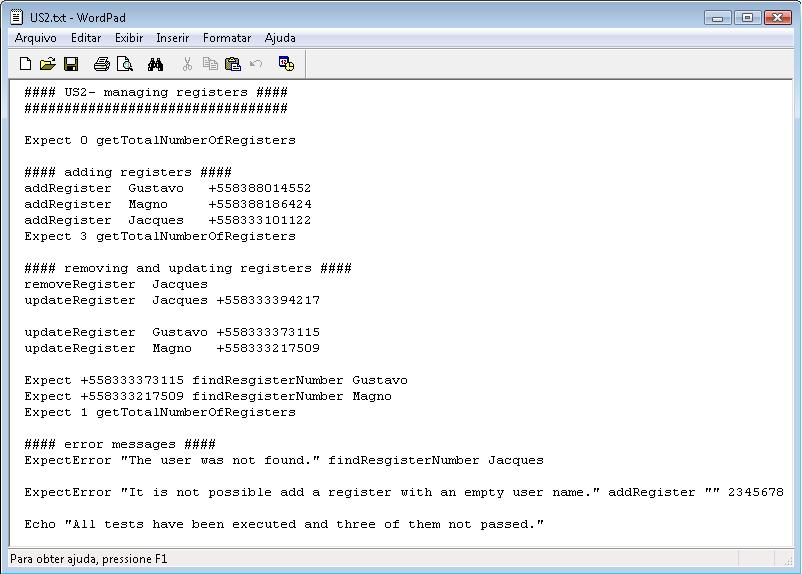
US2: Sample tests for a
PhoneBook
2. Developers write a single Facade to the program being tested that
contains methods corresponding to the script commands used in the acceptance
tests. The Facade may even already exist, used for other purposes.
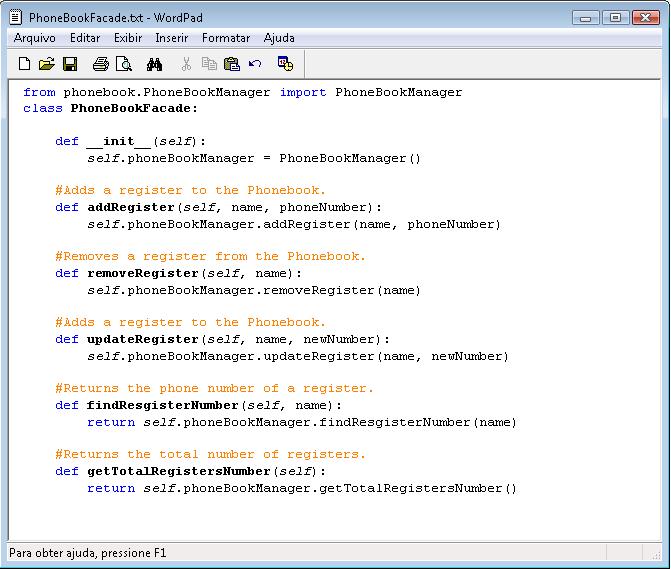
Facade for the PhoneBook
test scripts
3. Python EasyAccept takes one or more script txt files and the Façade,
runs the scripts through the Façade methods, and compares expected results to
the actual results produced by the program. The testing tool will receive the
façade instance once and all public methods contained in the façade will be
callable from a test script. Remember to separate the business logic from the
user interface. Your façade should not print anything anywhere. It should
communicate itself with the outside by accepting parameters, returning results
or throwing exceptions. Parameters and return values cannot be objects.
In order to call Python EasyAccept to test a program, the user needs to
import Python EasyAccept and use its API (Application Programming Interface).
See below how to use the testing tool to test the PhoneBook application by a
simple client class:
----------------------------------------------------------------------------------------------------------------------------------------------------------
from
pyeasyaccept.PythonEasyAcceptFacade import PythonEasyAcceptFacade
class SimpleClient:
#Put the US1 test script file into the "testScripts" array
userStory1 = "US1.txt"
testScripts
= [userStory1]
#Instantiate your software facade
phoneBookFacade = PhoneBookFacade()
#Instantiate PythonEasyAcceptFacade
pythonEAFacade =
PythonEasyAcceptFacade(phoneBookFacade, testScripts)
#Execute the tests
pythonEAFacade.executeTests()
#Print the tests execution results
print pythonEAFacade.getCompleteResults()
----------------------------------------------------------------------------------------------------------------------------------------------------------

Result
of running US1.txt test script
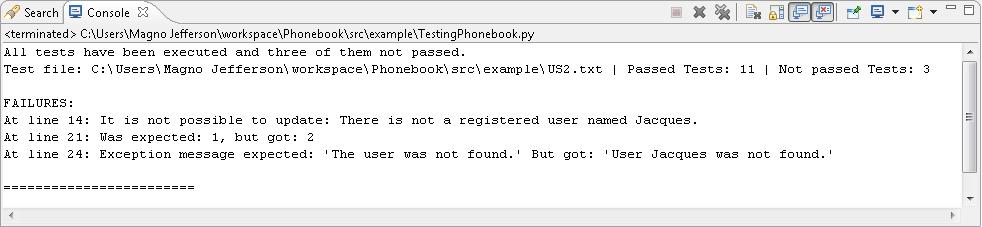
Result of
running US2.txt test script
Note
that the execution result of US1 test script informs that all the acceptance
tests defined at the test file US1 have passed. The tested business logic
operations worked as expected (according to the US1 test file acceptance
tests).
The
execution result of US2 test script informs that among fourteen executed tests
eleven of them have passed, while three have not passed. There are failure
descriptions for each one of the not passed tests. Below are shown the failures
analyses:
1.
The first failure description indicates that the acceptance test defined at US2
line fourteen has not passed. Note that at US2 line thirteen the user Jacques
was removed from the PhoneBook registers, that’s why we got the failure message
"It is not possible to update: There is not a registered user named
Jacques" during the try to update the user Jacques information.
2.
The second failure description indicates that the acceptance test defined at
US2 line twenty one has not passed. Note that at line seven the user Gustavo
was added at the PhoneBook registers, at line eight the user Magno was added
and at the line nine the user Jacques was also added. At line thirteen the user
Jacques was removed from the PhoneBook registers (at that time there were two
registered users, Gustavo and Magno). The acceptance test defined at line
twenty one expected that only one user would be registered but we got two
registered users, that’s why we got the failure message "Was expected: 1,
but got: 2".
3.
The third failure description indicates that the acceptance test defined at US2
line twenty four has not passed. Note that at US2 line thirteen the user
Jacques was removed from the PhoneBook registers, that’s why we got the failure
message "Exception message expected: 'The user was not found.' But got:
'User Jacques was not found'" during the try to find the user Jacques
phone number.
How
to Start Using Python EasyAccept
The
overhead of getting started with Python EasyAccept is minimal. Simply download
the latest version of Python EasyAccept from its SourceForge homepage and unzip
it anywhere. Later on, go to PythonEasyAccept root folder and execute the
"setup.py" file using the following syntax: "python setup.py
install". You can either put the PythonEasyAccept package
"pyeasyaccept" directly into your Python distribution folder
designated to hold locally-installed modules and packages (For example:
"Python25\Lib\site-packages").
In
order to use Python EasyAccept to test a program use it’s API. See the user manual for more information about the API.
Initially
we propose you to perform a simple test with the testing tool, in order to
begin your experience with Python EasyAccept. Just download the PhoneBook project and the test scripts US1 and US2.
How to use the Graphical User Interface of the Python EasyAccept
The graphical interface is composed of four features:
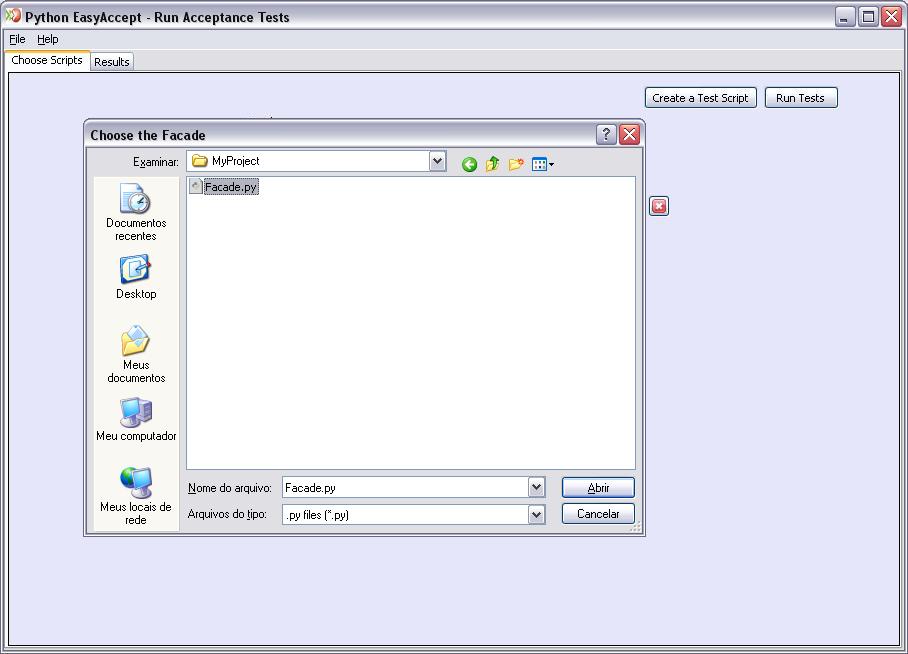
The first screen allows the creation of a Python EasyAccept project. A Python EasyAccept is a project composed of a façade and one or several test scripts. The following figures show the windows of the interface.
It's possible to select the desired façade that will be used in the project for run tests.

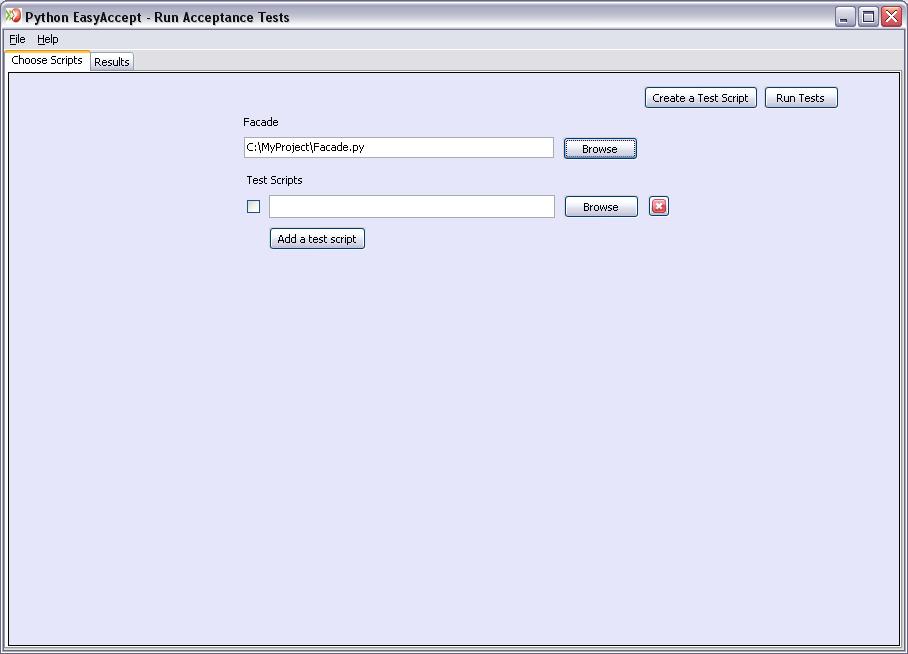
Now it's time to choose which test scripts to run. It could be done in two ways:
One by one
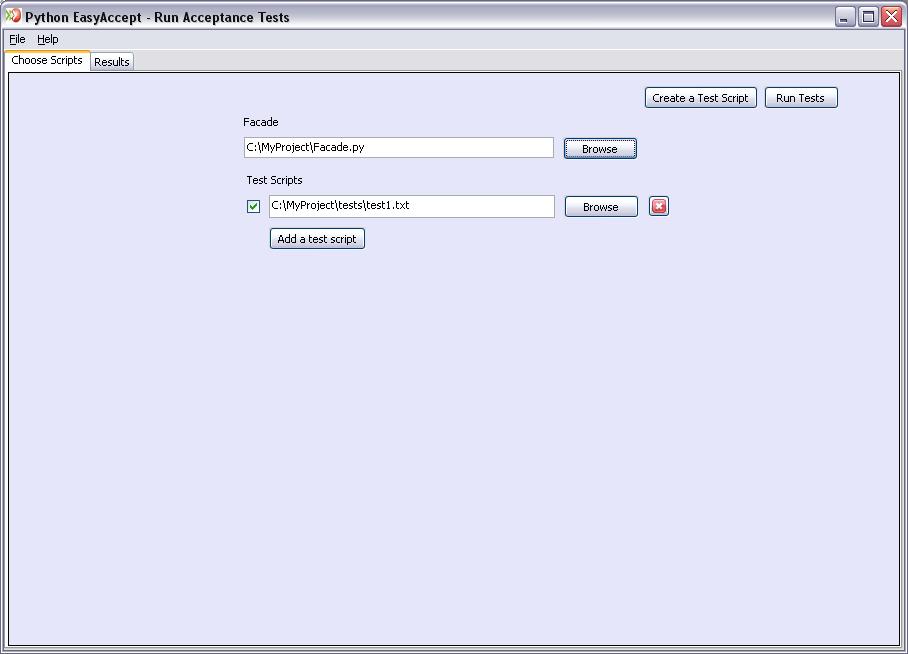
The
checkbox beside of script fields allows the selection of which scripts will
be executed.
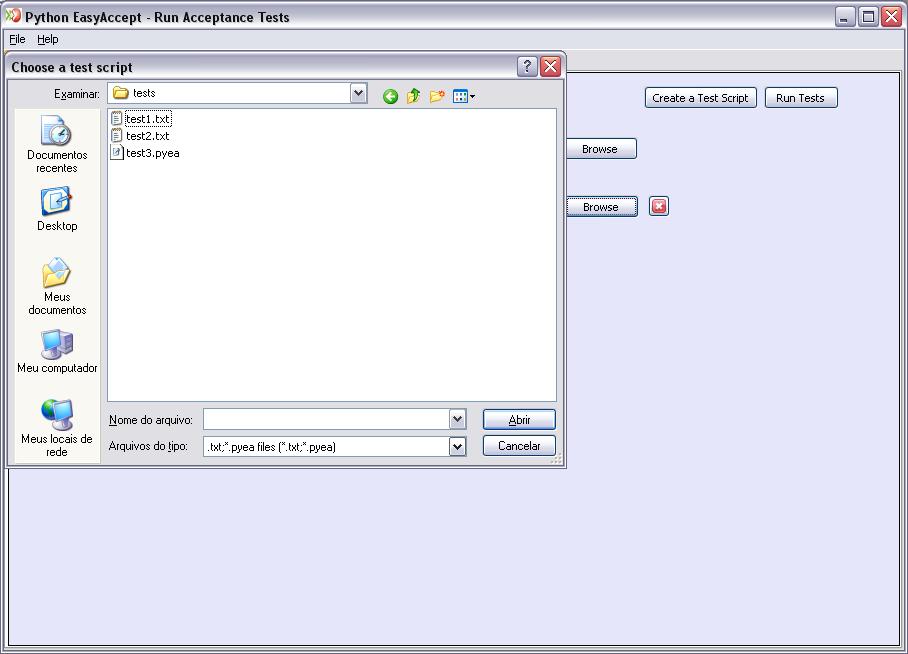
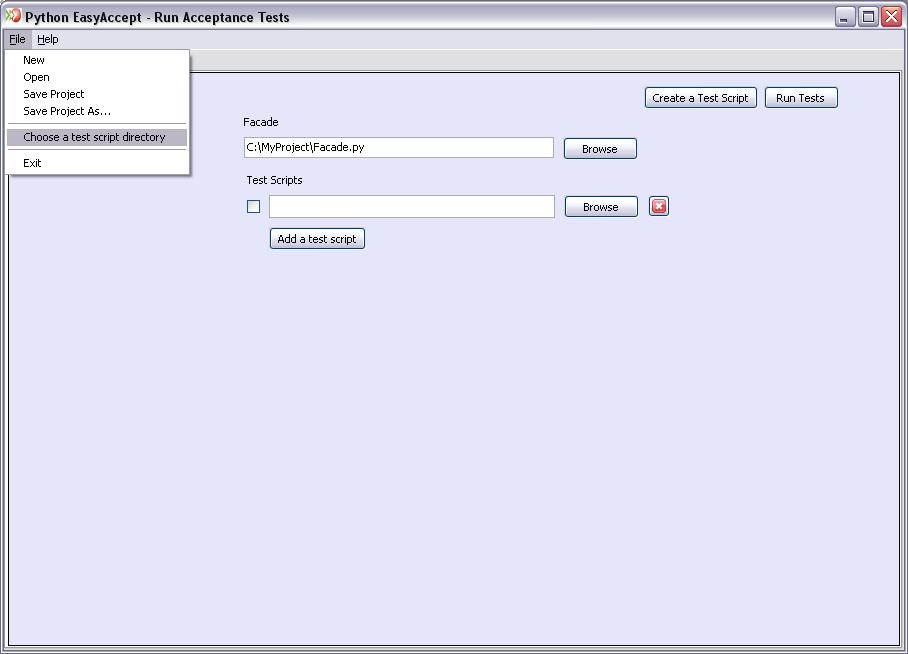
Choosing
a folder with all tests
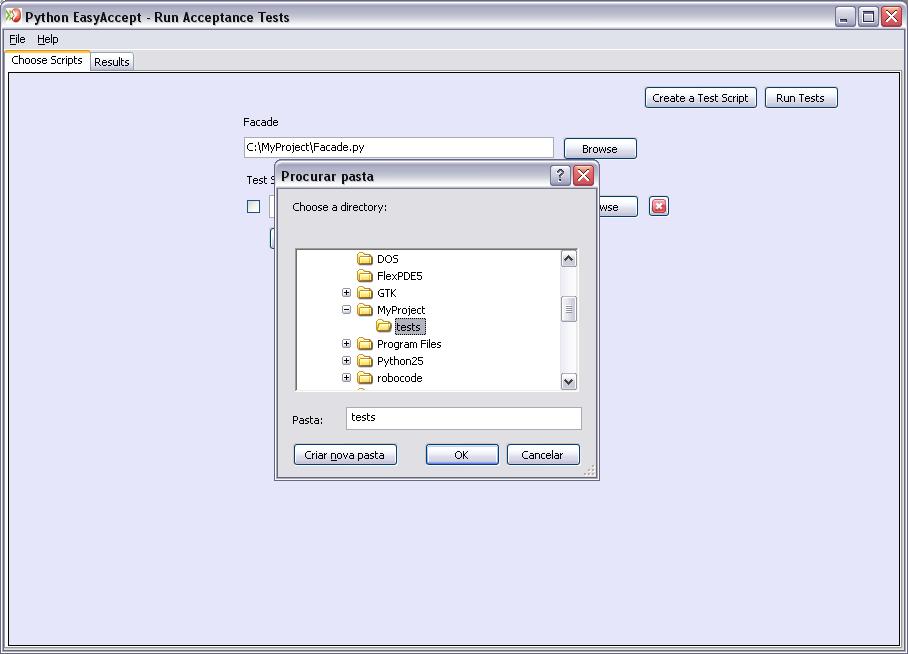

To
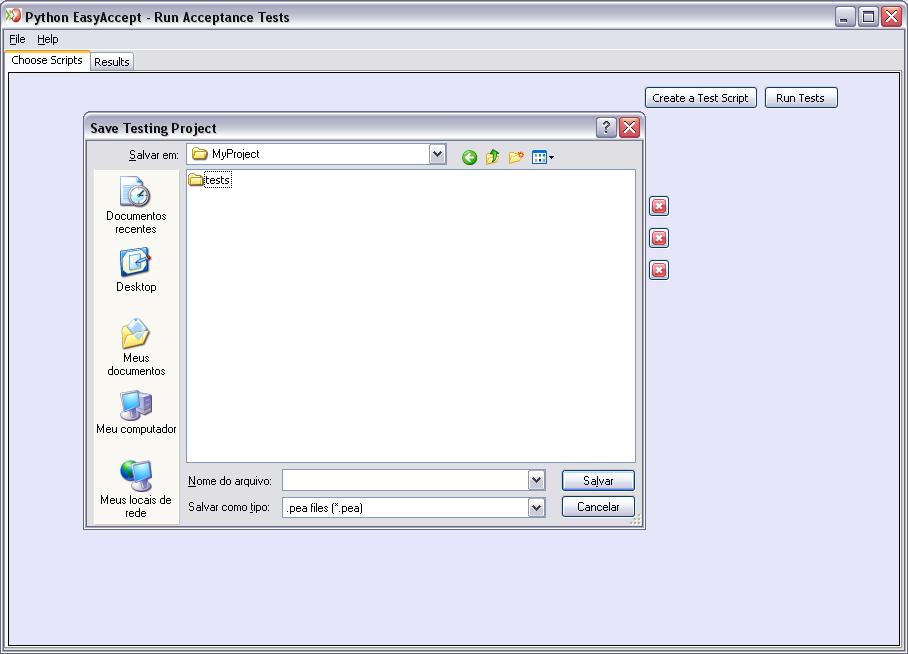
save your project, select Save Project from the File menu.
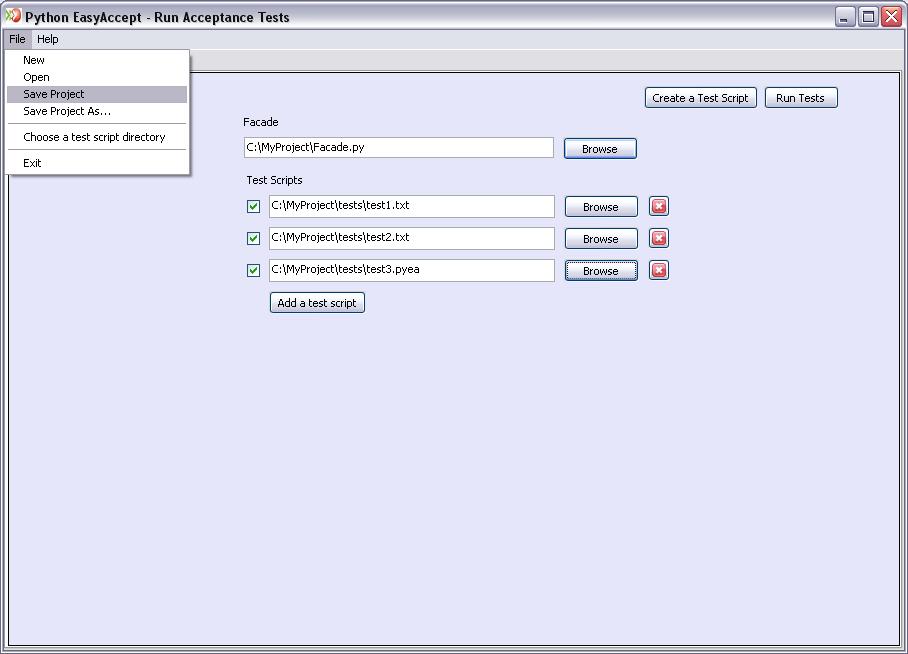
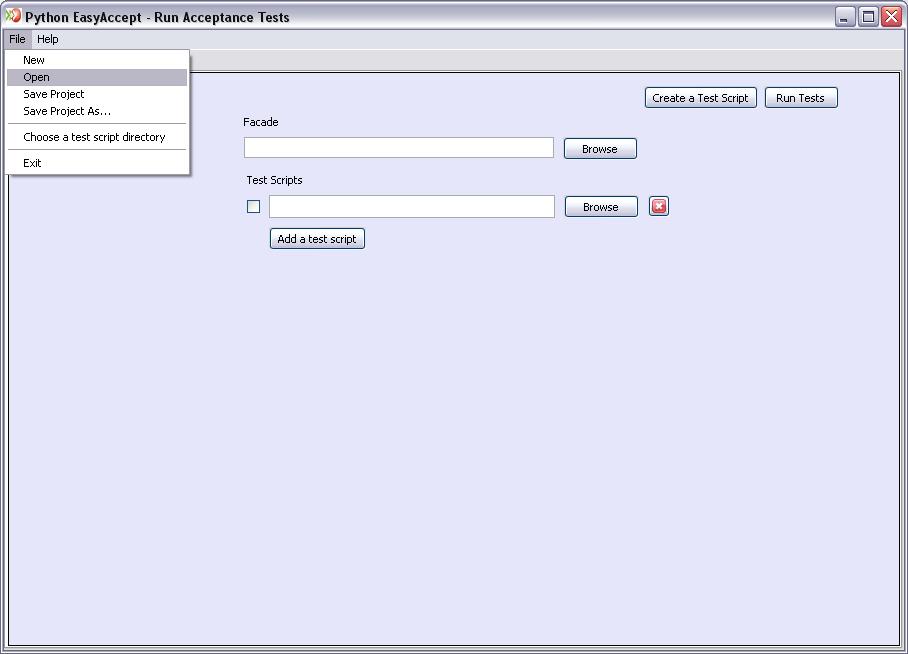
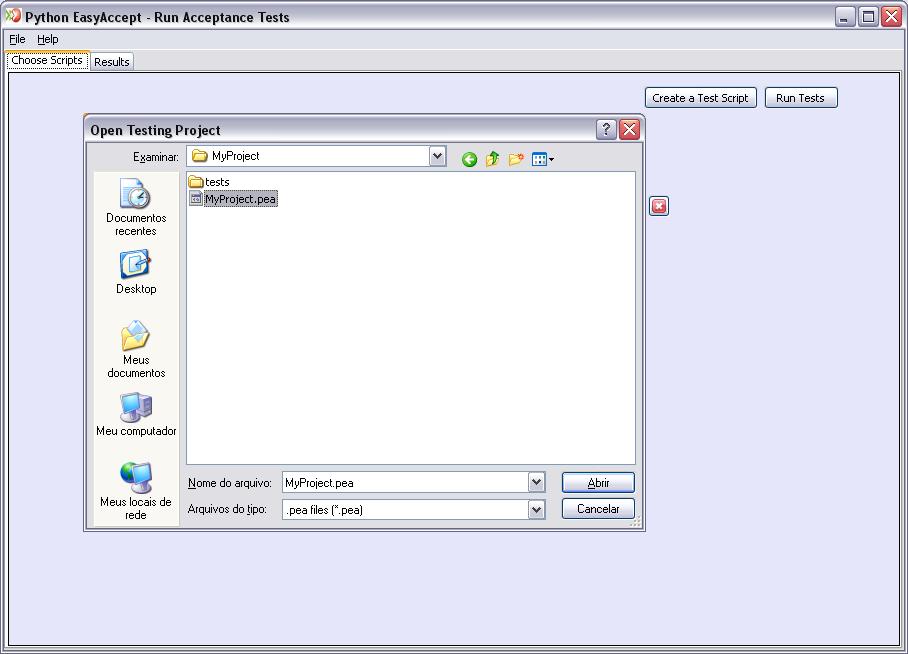
To
load a Python EasyAccept project, select Open from File menu.
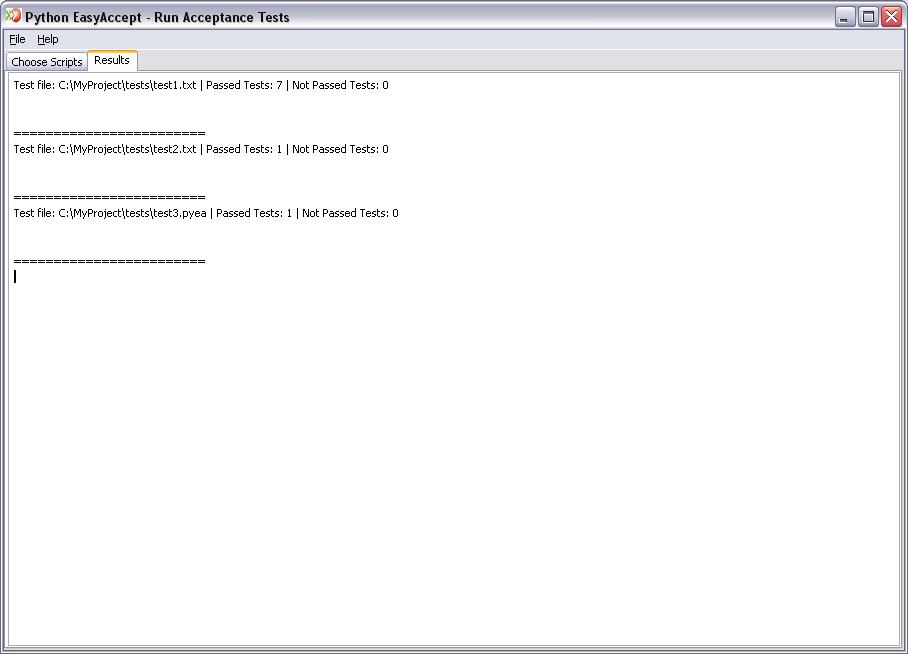
To run the created project, click on the button "Run Test". When the execution of the chossen tests finishes, a console view appears in the tab Results, showing the results obtained for the selected façade.
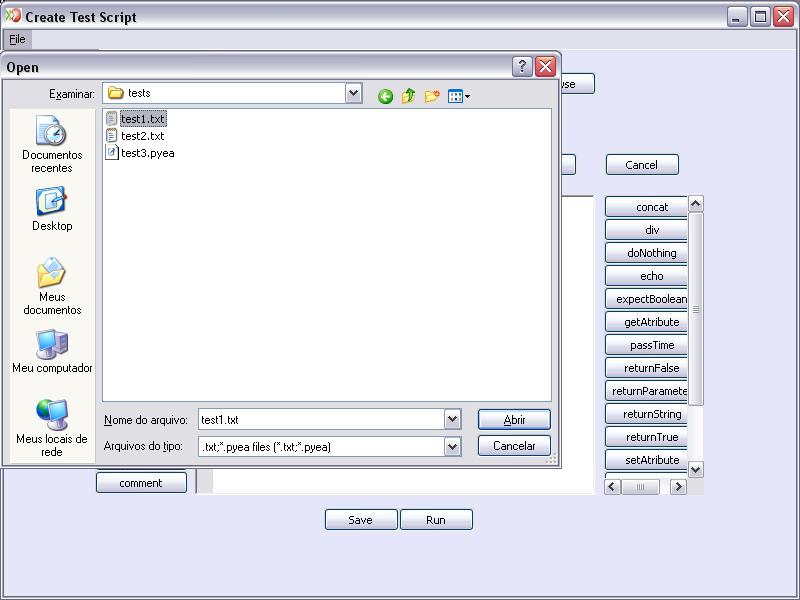
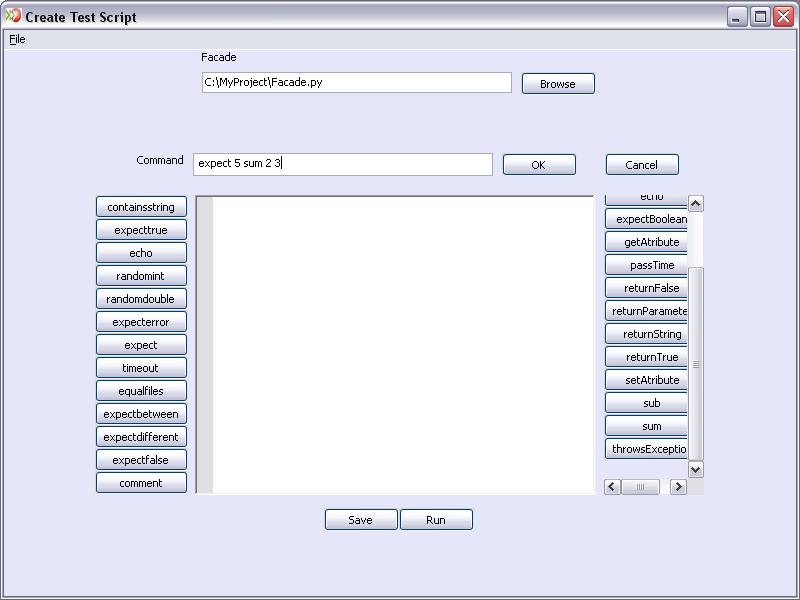
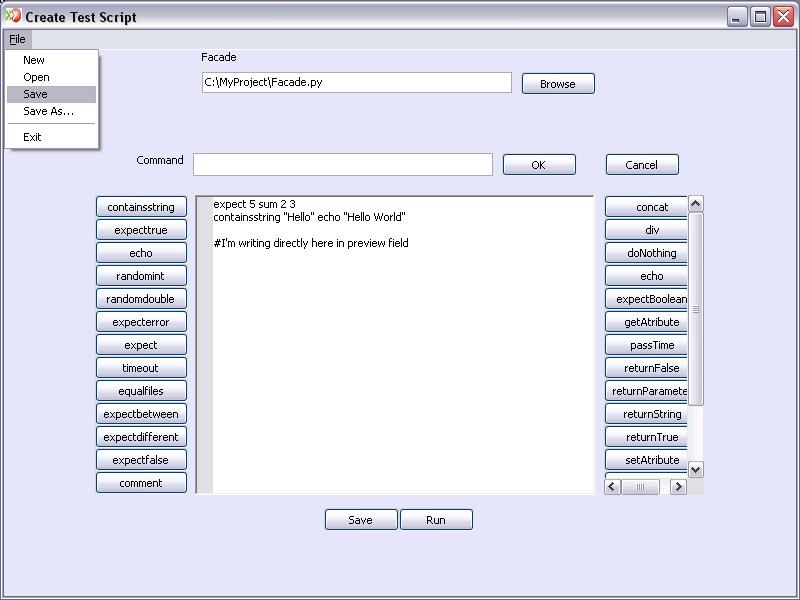
It
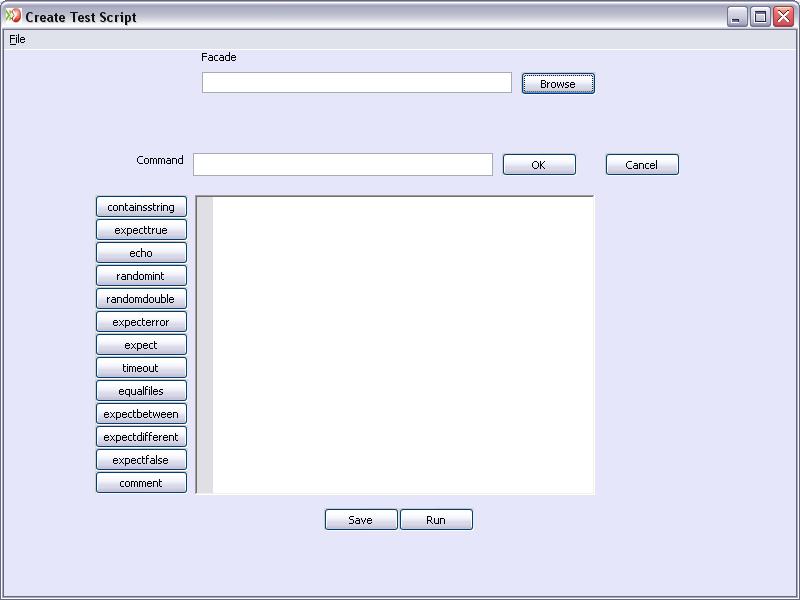
is also possible to create new test scripts. To do so, click on the "Create
a Test Script" button and it will open a new window which contains the Python EasyAccept
(left side) and the Façade (right side) commands.
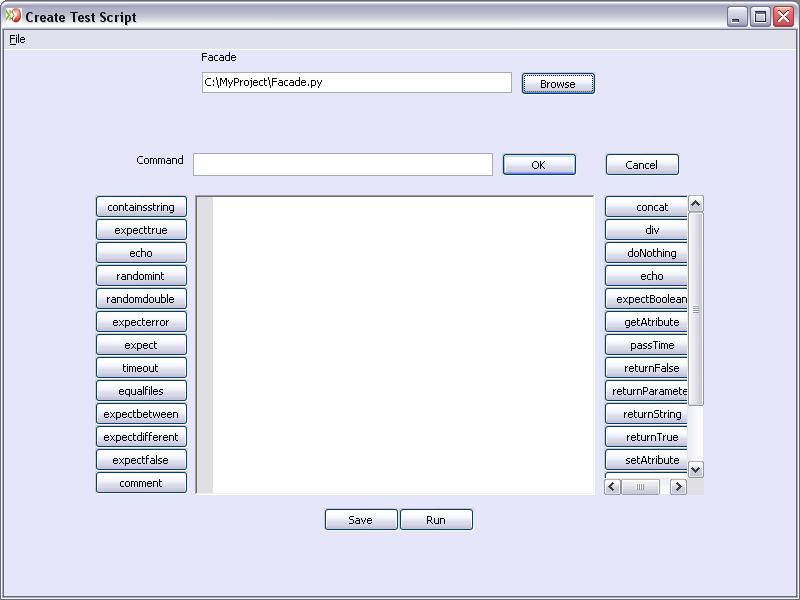
Fill the
first field with the façade which test scripts will use (if the façade
was chosen in the project previously, it will be set automatically). Then,
all commands of the façade will appear in the right side.
The script test can be created now, typing directly in the 'Command' field, pressing the buttons of the Python EasyAccept commands or the façade commands.
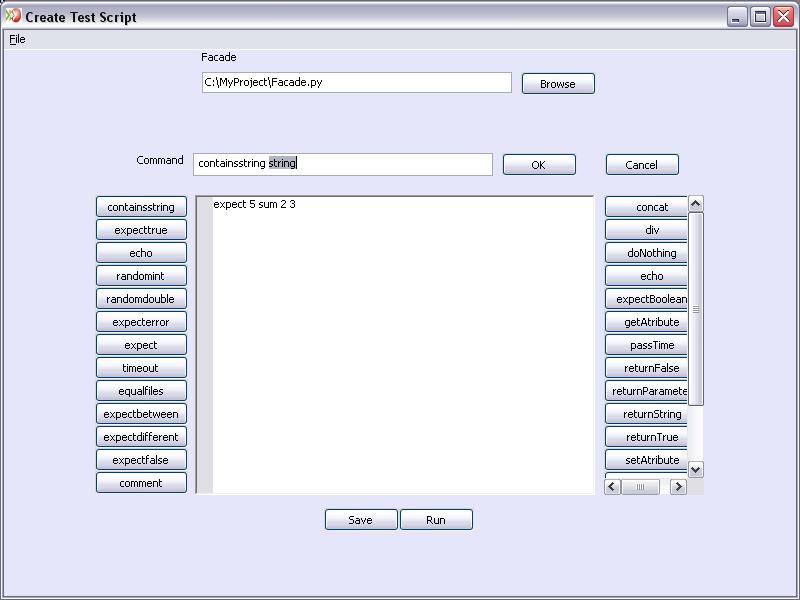
Typing
directly in the field
The
Python EasyAccept GUI has the auto-complete property. While the command is
written, it's showed all the possible commands that starts with that expression,
such the example below:
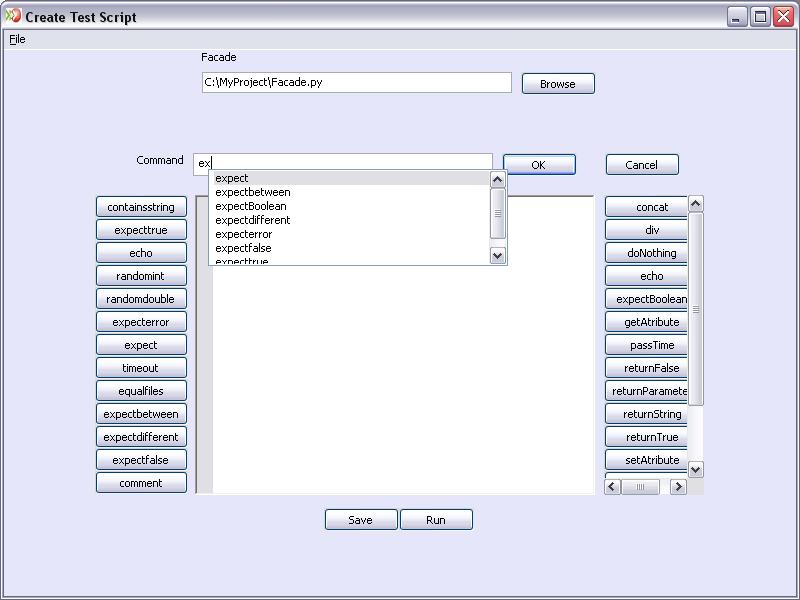
Choose the command and press 'Enter' or a double mouse click.

When the command is complete press 'Ok' for write in the preview field (the field in the center of the window) or 'Cancel' for reset.

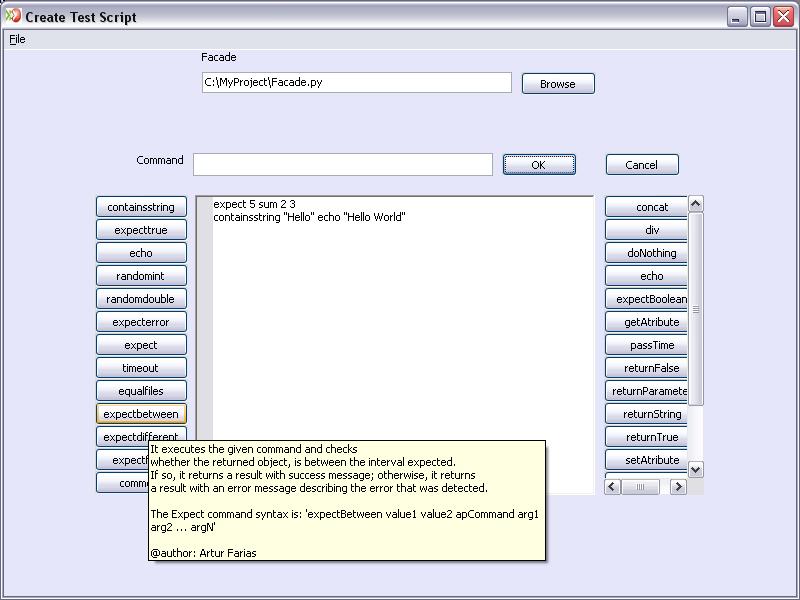
Pressing the buttons
The list of buttons in the left side represents all the commands of the Python EasyAccept, while the list in the right side the commands of the façade. Thus, when a button it's pressed the command will be put in the command field, like this:
After
press the button 'containsstring', the command field is alterated.
For
more informations about the buttons and their values or features, move the mouse pointer over them and look the tool tip with all the information necessary.
Python EasyAccept GUI also allows to type directly in the preview field. Just click on the preview and start type the lines of the test.
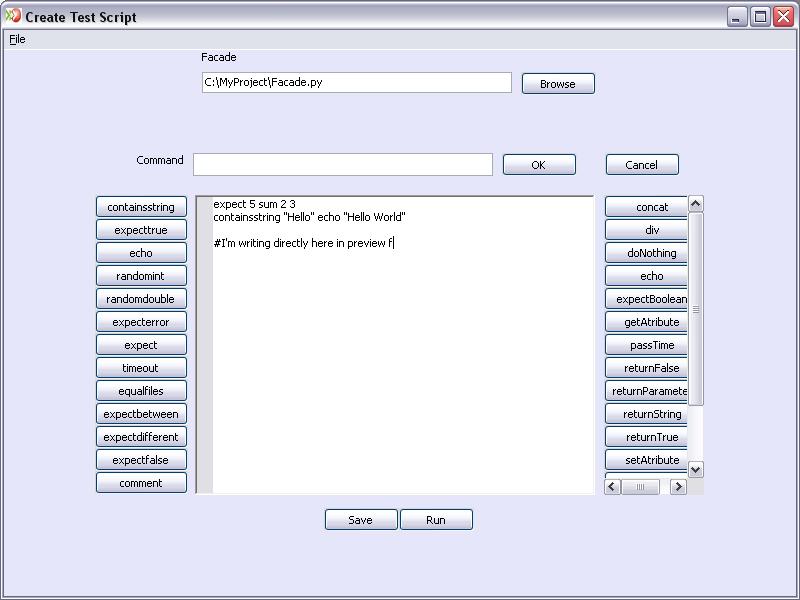
To
run the test which is being created, just press "Run This Test" and watch
the execution of the temporary test.
For save the test that was created, press the button "Save" or choose "Save" from the "File" menu item.
Other
feature that Python EasyAccept GUI allows is editing an existing test. To
load a test script choose "Open" from "File" menu item,
it will enable its edition.